Instead of continuing the saga of the Cube End Table, I thought I'd share some insights into jig making provided by the one and only Roger Deatherage of Fine Wooden Interiors. Roger is a master woodworker and has allowed me to take up his time and learn from him. Before we look at Roger's use of jigs in his workshop, let's take a brief look at the history of "mass production" and jigs/patterns in American industry.

I mentioned in the first few articles in the Measuring and Layout series that I wanted to talk about jigs and fixtures for use when you create more than one of the same part. The theory of repeatable, or interchangeable parts was popularized in the early 1800s by Eli Whitney when he wanted to mass produce muskets for the budding U.S. Army in preparation for war with France. Now, let's not get ahead of the story and assume Eli invented interchangeable parts made with jigs and patterns; the concept was brought about much earlier (in the firearms world) by the French gunsmith, Honore Blanc. As with many new and great ideas, his was squashed by the status-quo gunsmiths of the time that loved filing away at intricate parts for hours. It's bad for business when your competitor can make ten times as many guns as you can.
 |
| Lots o' parts. |
Leave it to an American with a deadline to produce 10,000 guns in two years, an unprecedented accomplishment, to get creative. It took him nearly four years to get the ball rolling with interchangeable parts and produce the first "randomly" assembled musket. Eight years and 10,000 muskets later, the Machine Age was born with pattern making and jigs at its core.
Fast forward to the present day DIY guy (or gal) in their garage. We can use jigs, casting molds, templates, pantographs, and more to make parts that are repeatably accurate. The precision of your jig manifests itself into the accuracy of the finished part. Take your time making the jig and you will reap the rewards.
Enter Roger's awesome jig collection and his ability to quickly make accurate jigs for making furniture. A great tip to learn from Roger is jig labeling - scratch a note on a completed jig to remind you in a few years of what that thing actually does. If you are really design oriented, reference part numbers to your jigs so that you can go back and make tweaks as needed. A good jig is like a good dog, never get rid of it!
Enter Roger's awesome jig collection and his ability to quickly make accurate jigs for making furniture. A great tip to learn from Roger is jig labeling - scratch a note on a completed jig to remind you in a few years of what that thing actually does. If you are really design oriented, reference part numbers to your jigs so that you can go back and make tweaks as needed. A good jig is like a good dog, never get rid of it!
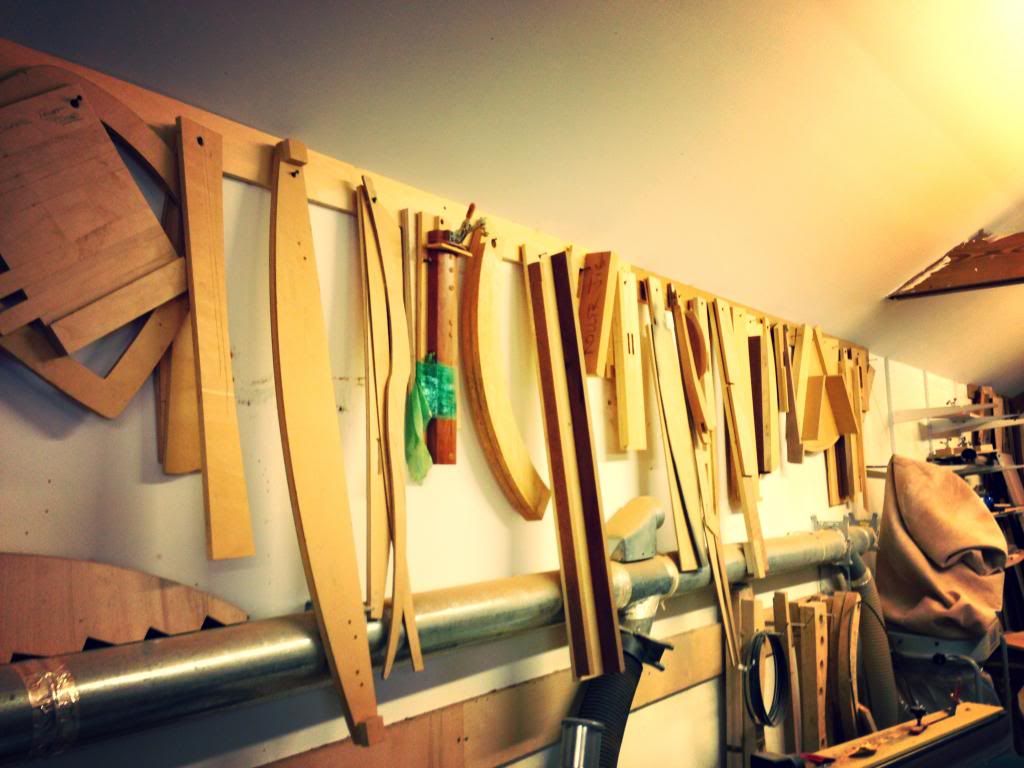 |
| One wall of jigs. |
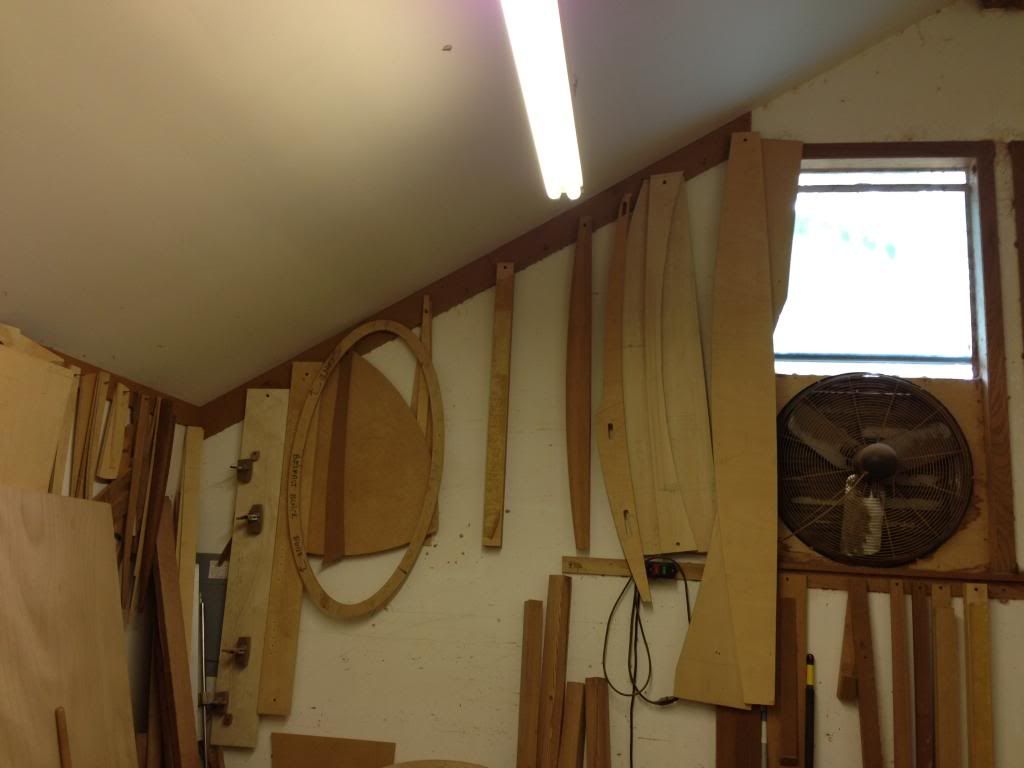 |
| Two walls of jigs. |
What do you make a jig out of and when should you use one? For woodworking and a lot of around the house projects, materials such as MDF, birch plywood, particle board and dimensional lumber work great. The trick is to use stuff from the scrap bin to minimize cost while using quality material to make a rigid and sturdy jig. Another great resource is the vast selection of jig building tools available at woodworking retail shops. These jig kit builders are handy in a pinch and are very modular. I like to use one any time I am making something twice. I really like adjustable jigs for doing things like cutting mortises and tenons. Trust me, it's a good idea.
 |
| T-Track kit from Rockler. |
Rockler sells a lot of jig building kits. Between the T-Track systems and the cam-style rubber nosed clamps, you can build some very creative jigs. Don't forget the value of glue up fixtures either, something that I'll cover later on. These "Jig-It" systems can create valuable gluing jigs to help keep your parts aligned.
People that work in metals typically use forming tools, bucks and welding fixtures. This type of medium is similar to woodworking jigs but must be created in vastly different ways. We will look at those sometime in the future too.
People that work in metals typically use forming tools, bucks and welding fixtures. This type of medium is similar to woodworking jigs but must be created in vastly different ways. We will look at those sometime in the future too.
How does Roger use jigs to create awesome furniture like the piece below?

Let's go through the jig he used to make the back leg of a rocking chair that's similar to this design.
First Roger cuts out the final piece he is looking for. This piece needs to be sized exactly as the production run pieces will turn out. The cross-hatch lines indicate where the leather attachment points will be.

The shape we want can be seen below. Maybe I should have led with that picture...

Look at the picture below. The jig (part on the left) was carefully made to mimic the curves that the template had. Note how the clamping blocks also follow the curve. Disregard the orientation of the quick clamps, pretend they face the other way.
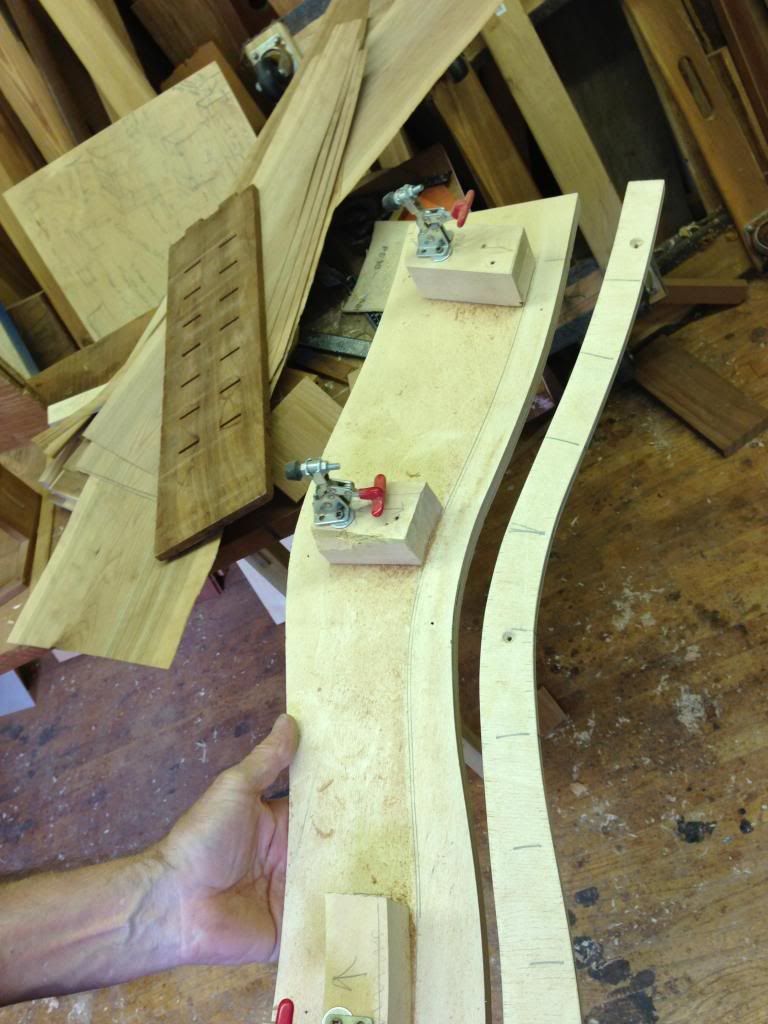
This particular jig is reversible. It can be used to cut out both sides of the piece by simply reversing the clamps (hence the orientation issues earlier).

The next step is to lay the rough cut walnut down on the jig, clamp it, and use a flush trim router bit (the kind with a bearing on the end) and cut it to final shape using a palm router. The link is just a reference, I don't own or endorse those bits. Legal stuff and all that.
The part can then be rounded over to make those wonderful smooth and rounded edges. This all looks very complex to most of us besides Roger, but that's nothing. Let's look at a really cool jig that he built to drill 3 equally spaced (120 degrees of separation) stool legs on a 12 degree cant in a solid cherry base. I was shown this drilling jig with the caveat that he finds some twisted pleasure in finding a really hard way to do something simple. I think it's fantastic.
First up - the torture machine in its entirety. The stool seats are heart shaped, hence the heart shape. Don't get emotional just yet.
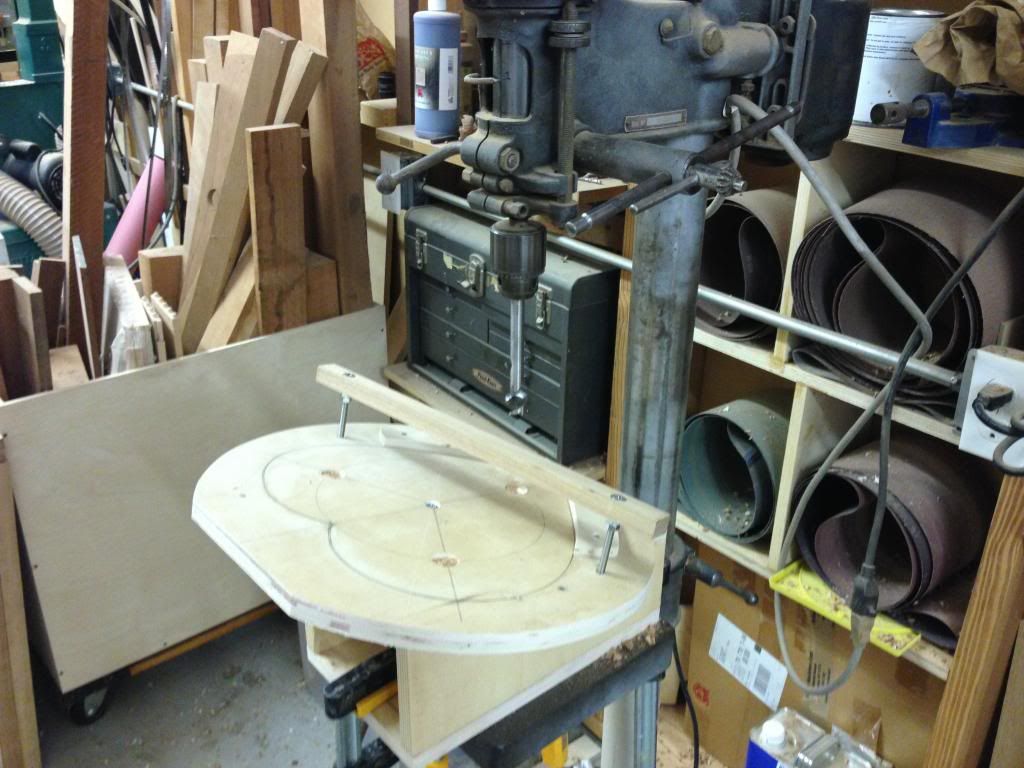
Let's break it down into its parts. An easy to identify feature is the angle that the jig is sitting at. This is probably easier than rotating the drill press base due to accuracy problems and a tendency for it to not want to lock in place when at an angle. I've experienced that problem when I was making this:
 |
| Don't ask. |
Another feature is the hold down bar running across the top. With just a few twists of the screws the part is locked firmly in place on the jig. Note the stop blocks on the bottom to also aid in alignment. The locking arm works in conjunction with some not so noticeable screws barely protruding from bottom. Roger's trick: use a 3/4" screw in 3/4" material and the sharp tip will just protrude through locking in a wood piece without doing much, if any, damage to the product. That was paraphrasing of course.
The picture below is the bottom of the seat boring jig. The Phillips screw seen below is one of those points. The countersunk T-nuts hold the threaded rod for the hold down clamp and the little dowel is the stop that's used to rotate the assembly to drill out each new hole. The threaded rod on the left side is the axle that the entire thing rotates on.
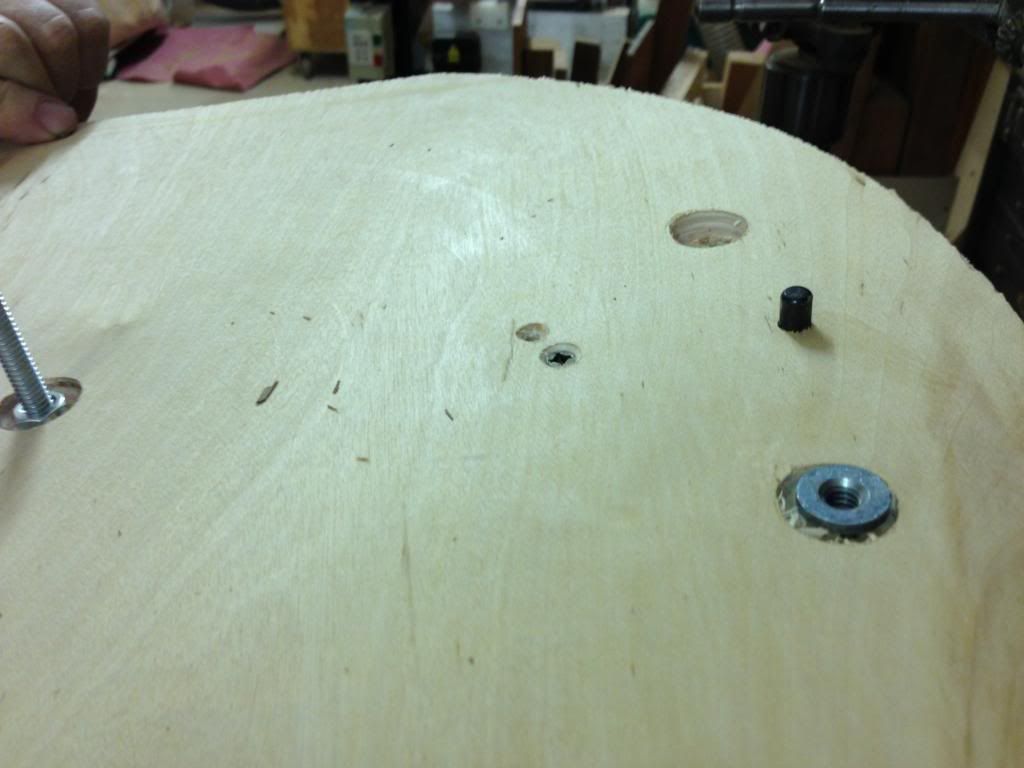 |
| Cleverness at its finest. |
OK, OK, these pictures are great but I bet you still don't get it. Well, how about a howtoforengineers first - a video?! Please excuse the not so talented videographer production specialist (me).
Get out there and make some jigs! There are lots of examples on YouTube and forums all over the 'net. Again, MDF is a great material to start making jigs with. It's relatively cheap, flat and machines nicely with a router. Another invaluable tool I've found in my own jig making is a pocket screw jointing jig. This tool allows you to spend more time building what you want than you spend making the jig!
Another viewpoint on jigs is that they are losing "sex appeal" to the masses of modern craftsmen. It's really easy to forego jigs when you can easily cut out accurate parts with your CNC router. My thoughts are mixed on this field as I really like new manufacturing and hobby technology, but I see the need for knocking out a quick jig to cut out parts. Use jigs and CNC cutting tools at your discretion, but really think about the time and material investment before you commit to one or the other.
Happy jigging, post up some of your custom jigs!
ReplyDeleteIncredibly useful blog site. Alit connected with information sites When I view right now tend not to definitely produce most things that Now I am keen on, although Now I am most assuredly keen on this blog. At this point simply click here best kitchen remodeling Simply just idea I always could write-up in addition to inform you about.