An Introduction
Now that we know how to measure accurately and cut precisely, let's get to work and make something cool. If you haven't noticed, industrial styled furniture is in. Bare wood and steel, rusty bits, reclaimed vintage - those are the new cat's meow. This little project combines all of that into one sweet, sweet package.
The table was kick-started with a desire to beat the man and his price gouging by creating a similar table but with materials chosen by me (and the BOSS). The initial design element was carefully created around a wonderful design by one of my (and probably your) favorite stores that you don't actually buy anything from: Restoration Hardware. These guys are good, despite a lot of their stuff being not too well built and overpriced for the average middle class family. Below is the table in question.
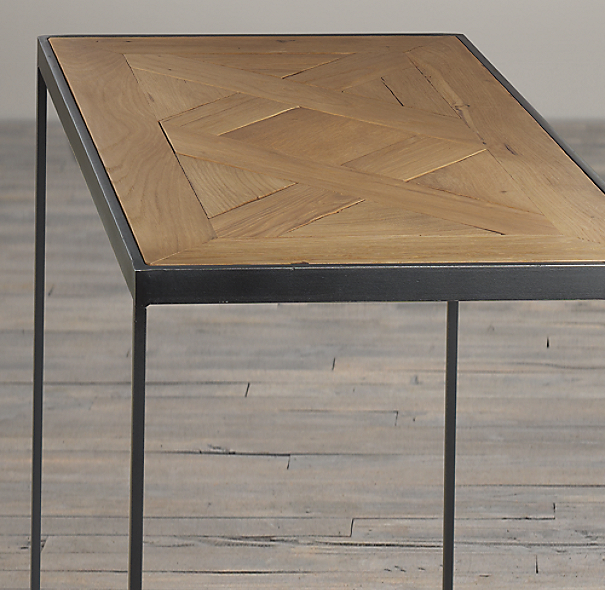 |
| Reclaimed Oak Parquet Side Table. |
Some pros: it's solid wood, although I'm not sure how the parquet pattern is fastened together. I'd like to think tongue and groove. Secondly, it is solid steel, and fully welded. It should last quite a while and really is probably worth the money if you don't want to make one but like the style.
Some cons: wow, it's expensive.
The table we will put together has a few changes. It's cheaper. Beefier legs and runners. It's walnut instead of reclaimed Russian oak. I went with 3/4" steel for the legs and 1.25" x 3/4" steel for the runners. I chose solid bar stock over tubing because the bar stock has nice square edges as opposed to the rolled edges of tubing. I wanted crisp lines to keep it contemporary looking. The beauty of this table is in the minimalist design - no shelf and small supports.
I also changed the dimensions to sit nicely with our couch. The table's outside dimensions are 24 inches square by 26 inches tall. I would have liked to use the Golden Ratio, but compromise is the name of the game. Chris Pentago writes an excellent article with a modern analog to the Golden Ratio here.
Here's a blurry, not-so-good picture of the final result. With any luck I'll replace it with a high-res jaw dropping substitute soon enough.
 |
| Ignore the pillow. |
Time and Materials
This is not difficult to make, even if you are self-teaching yourself along the way. I'll show you how I made the table, and suggest some alternatives if you don't have the tooling or think that the safety risk is too high for certain steps.
Material
Walnut - We chose walnut for the top because we wanted something "light" but that had a great contrast. Walnut is typically prized for it's dark hue and great grain patterns. The lightness comes from the sapwood, or the light rings of color associated with new growth. I originally wanted some wormy chestnut to make it look and feel more "vintage" but, the boss won, and it was a good decision, especially considering the cost of said wormy chestnut. Below is a shot of the raw stock (this board not used in the table) that we purchased from Clark's Hardwood Lumber Co. There's a lot of information to know about buying non-dimensioned lumber in a real lumber yard. You should know and ask about the way it was dried and the moisture content. This is important later. Lumber from these types of shops is typically sold in units called the "board foot". This is literally the un-milled price of a square foot of lumber one inch thick.
That thickness is also important - it's measured in quarters. For example, a two inch thick board would be labelled as 8/4. A three quarter inch piece would be 3/4. Note, that if your lumber is milled (or surfaced) you will pay for the material that was cut off. This concept is why when you buy lumber from a big box store, you get a piece that's 1.5" by 3.5" that's labelled as a 2x4.
A good intro into this all can be found here. (Opens in a new window). Watch the entire series if this is new to you.
Lastly, depending on what tools you have, you'll need to decide if you want un-milled or surfaced product. You might see labels such as "S3S" or "S4S". The first being Surfaced 3 Sides and the latter Surfaced 4 Sides. If you have a table saw or jointer or hand planes or unlimited patience and a pocket knife, get the S3S or less. If you don't have any of these, get the S4S - your lumber will be relatively straight and ready for you to glue up (as long as you pick straight boards)!
I bought two boards of 4/4 S3S walnut. In the picture below, the right side is surfaced flat (relatively) and the left has the live edge. Be cautious that the live edge never gets narrower than your final desired board width.
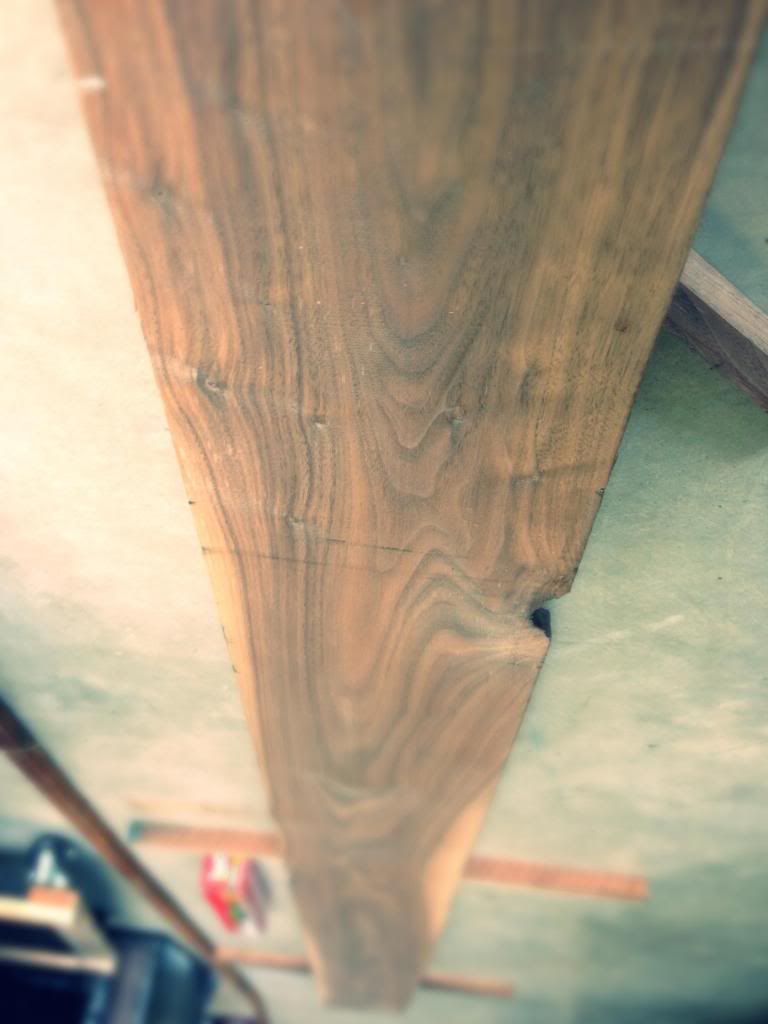 |
| Beautiful. |
Two boards, enough for two tables (24x24 inches), cost me about $100. I would say that walnut is a little bit more expensive here in Texas than what you can find closer to where it naturally grows. You will probably struggle to find a price list for the various lumber varieties as you walk around. Grab a sales guy and get them running.
I'll talk more about wood selection, movement and properties when we start the glue up. This is an engineering type blog after all.
Steel - I got the steel from a local steel yard. Obviously. You will spend twice as much trying to get steel from a box store or ordering online. The place I shop is great because they sell seconds, or non-certified, steel at discount prices. You just walk around until you find what you need, get a ticket, and the guys load it up for you. These seconds are generally rusty and/or pitted, so it was perfect for this project. I got about 25 feet of 3/4"x3/4" solid bar stock and 20 feet of 1.25"x3/4" solid bar stock for about $50. Nothing fancy here, just get mild A36 hot rolled steel. At a later time, because I forgot when I was at the yard, I picked up some half inch by eighth inch bar stock at Home Depot. It was really expensive, but I needed a lip to support the top in a hurry. I wish I would have gone with one inch by eighth inch for more support - more on this later too.
Pan Head Screws - Get some short (top board thickness minus 1/4") pan head screws to secure the top. I chose coarse threads, even though fine would probably work for the hard walnut. Rule of thumb - coarse threads for soft woods, fine threads for hard woods. These screws are typically used to fasten drawer slides to drawers and attaching drawer faces to fronts. I got mine from Woodcraft for a couple of bucks.
 |
| 3/4" Pan head screws from Woodcraft. |
Finish - What a broad topic. I used, for the first time, a water borne Polyacrylic finish from General Finishes. This is a game changer. It dries fast and clear, without the yellow from oil-based finishes. Get yours online or at a higher end finishing shop. I spent about $20 on mine from WoodCraft.

There are some other consumables used, but I keep them on stock at all times (as should you). That list would include rags, foam brushes, sandpaper, glue, etc. That's it. On to the tools.
Tools
Don't panic just yet. You'll need a few common tools, some not so common for the apartment dweller DIYer, and some that you'd really want a dedicated spot with some good safety gear to back you up. Let's start with the easy stuff.
(This list reflects what I used, we'll cover workarounds in the individual steps as we get there) Things I consider mandatory, or what I wouldn't attempt this without, are in bold. The others can be subbed with more elbow grease and or good friends.
- Tape Measure
- Pencil
- Speed Square
- Drill with drill bits
- Metal Mitering Saw
- Welder (I used a Millermatic 211)
- Angle grinder
- Hand Files
- Magnetic Angle "Clamps"
- Woodworking Miter Saw
- Table saw
- Jointer
- Thickness sander
- Sanding block
- Clamps - both beam and bar and C and spring and quick... (Never enough clamps)
Don't look at this and see an impossibly long list of stuff you don't have. You could really get this all done with a hacksaw, a buddy with a welder, and some wood glue and clamps. There are loopholes to everything.
Time
How long does it take? I probably had about 6 hours total invested into the table. Keep in mind that I was able to quickly rip and mill the rough stock down, get it glued up and thickness sanded due to some high end tools that a friend graciously lets me use in exchange for good beer. If you used S4S lumber and a hand held belt sander, It could be done in nearly the same amount of time, maybe an hour more. Please note that hours doesn't translate into days. You'll need some overnight drying time to factor in.
Getting Started
Go forth and gather your tools and material. So far, you can imagine being into this project for less than $200 (for two tables!) and a weekend's worth of work. Sounds like the perfect gift idea for that significant other.. When you get everything lined up, come back and I'll have some more ground covered on getting the metal cut and welded up. We'll talk about saw stops, cutting steel and welding. Good luck, post up your lumber and steel selections if you have them!
Be thankful for putting up with the help of chiropractor healthcare professional. The blog further might possibly there are given that type shared throughout their average amazing approach. It’s simple to simply click in this best kitchen renovation Aside from honor an internet site.
ReplyDelete