Everything should be in place now to join the two pieces that you've labored over for hours and hours.. There's one problem, the top fits just inside the cube... If only we could weld some tabs in place to support the top and allow for seasonal wood movement at the same time....
An easy step by step and metal finishing techniques after the jump.
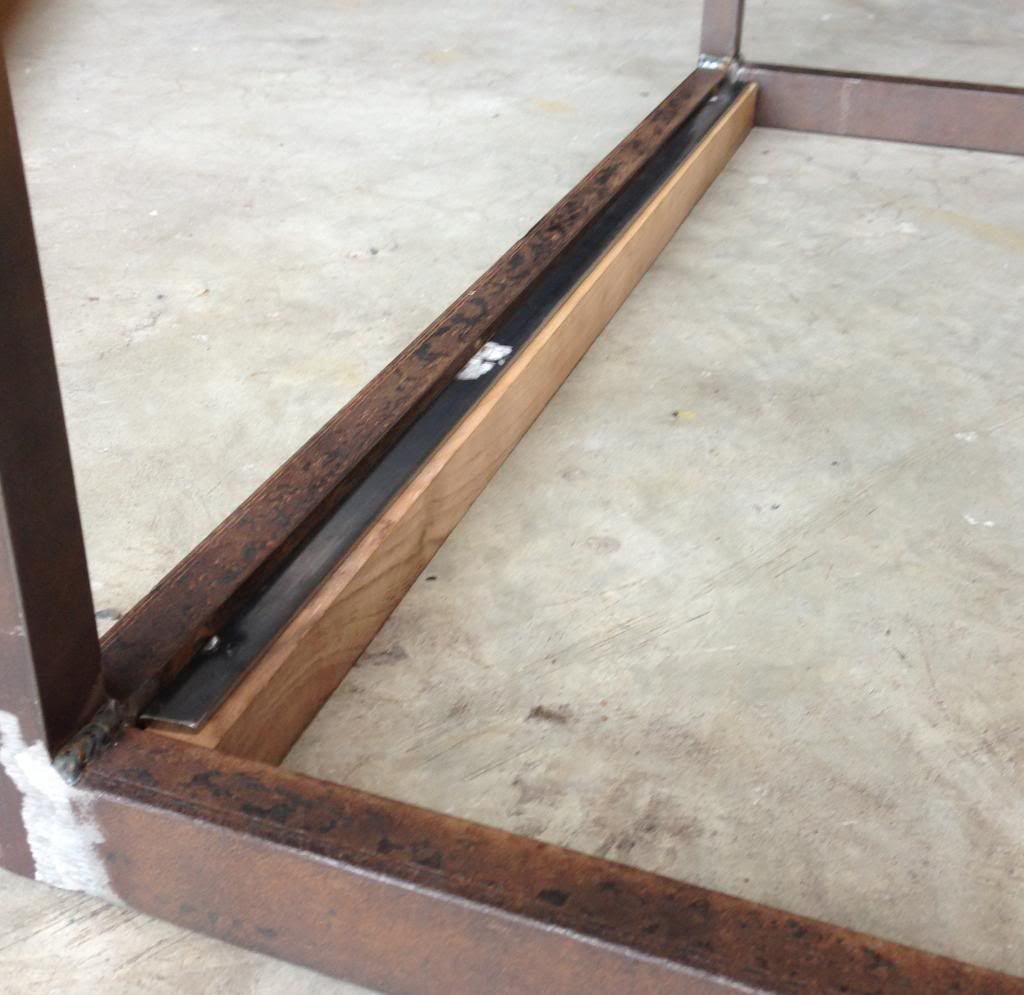
Flip the steel cube upside down and put some scrap top pieces against them as seen in the intro photo. Lay the steel bar stock on top and tack it in two or three places. I raised the wood up off the floor maybe 1/16" with shims so that it wouldn't sit proud of the steel and expose an edge.
Tack another support on the opposite side, and down the long sides if you so choose. I just did two.

You'll get something like this washed out camera phone photo shows. Then, take a square and a crescent wrench (use the wrench to grip around the bar and slowly bend it one way or the other) and square the support to the side of the frame. Once it's all in place, weld 2" stitch welds on 6" centers - meaning weld two inches, skip 6" or so and repeat. Warning, do the welding on the bottom so that your top still fits!!
Once you get that done, lay your top back in, with the boards running perpendicular to the supports. You want to support them on the end-grain edge. Mark the rough centers of the individual boards on your newly welded in piece of bar for drilling later.
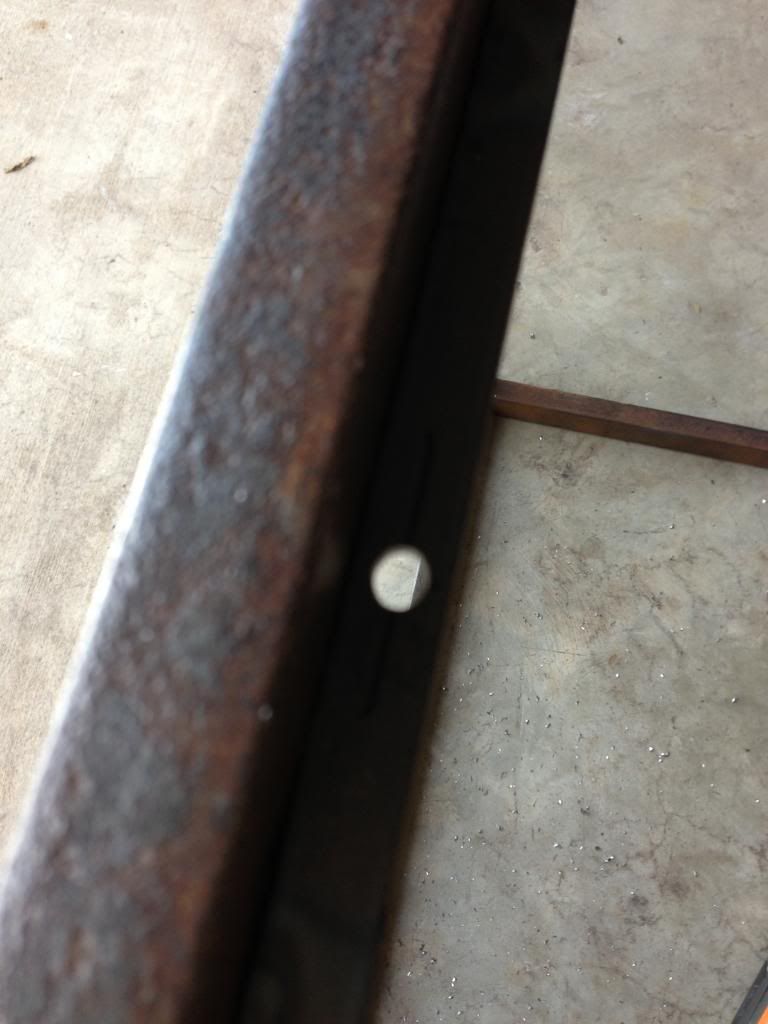
Locate the center of the flat bar at your marks, center punch them.
Get an automatic one if you can. They are the cat's meow.
 |
| This car is the cat's meow. |
Drill pilot holes with a 1/8" twist bit. If you want to get technical, your drill RPM should be (for a 40 foot per minute cutting speed) about 1200 RPMs. I doubt your hand drill will do this, but just crank it up and let it rip. Use a drop or two of cutting oil if you have it. Cutting speed, feed rate, depth of cut all determine the rate of metal removal. These conditions, plus the material determine the power requirements of the machine you are using to take the cut with. As such, it's hard to dial in a RPM number for your application. To be really technical, pick up a copy of the Machinery's Handbook and back track through the charts and tables to pick your desired speed.

Turn the round holes into an oval with a rat-tail file. The ovals are needed to compensate for the wood's seasonal expansion. A file only cuts in one direction (usually) trying to cut in a push-pull operation will round over the cutting edges and dull the blade faster than you'd like.
 |
| Nice and blurry, like you like it. |
You're done with the metal working! To seal the metal and keep your house guests from rusting their clothes up, I used an old rag to wipe on the same sealant used on the top. It was suggested to use shellac to me by a friend, but I really didn't notice a difference.
Set your top back on, once the metal is dry and mark the newly drilled holes with a pencil. Remove the top (again!) and drill small pilot holes for your attachment screws.
I used these (1" length):
 |
| From Woodcraft. |
Put the top back on (again!) clamp it with a little bit of pressure, and use a hand driver to snug up the screws. Now, don't over do it, as you want the top to be able to move as the wood moves. Just snug them up tight enough so it doesn't rattle when you set a glass or book down on the top.
Voila! Your new table, in another crappy cell-phone pic, is done!

Thanks for being patient with this ongoing writeup. I can finally move onto a few of the other things that have been cooking around the shop.
No comments:
Post a Comment